
ABSTRACT TEXTURED ARTWORK FOR THE HOME
Textured paintings can add a unique dimension to your home. Dynamic in nature, textured artwork will change its appearance as the light changes and create a dramatic and interesting focal point in any home.
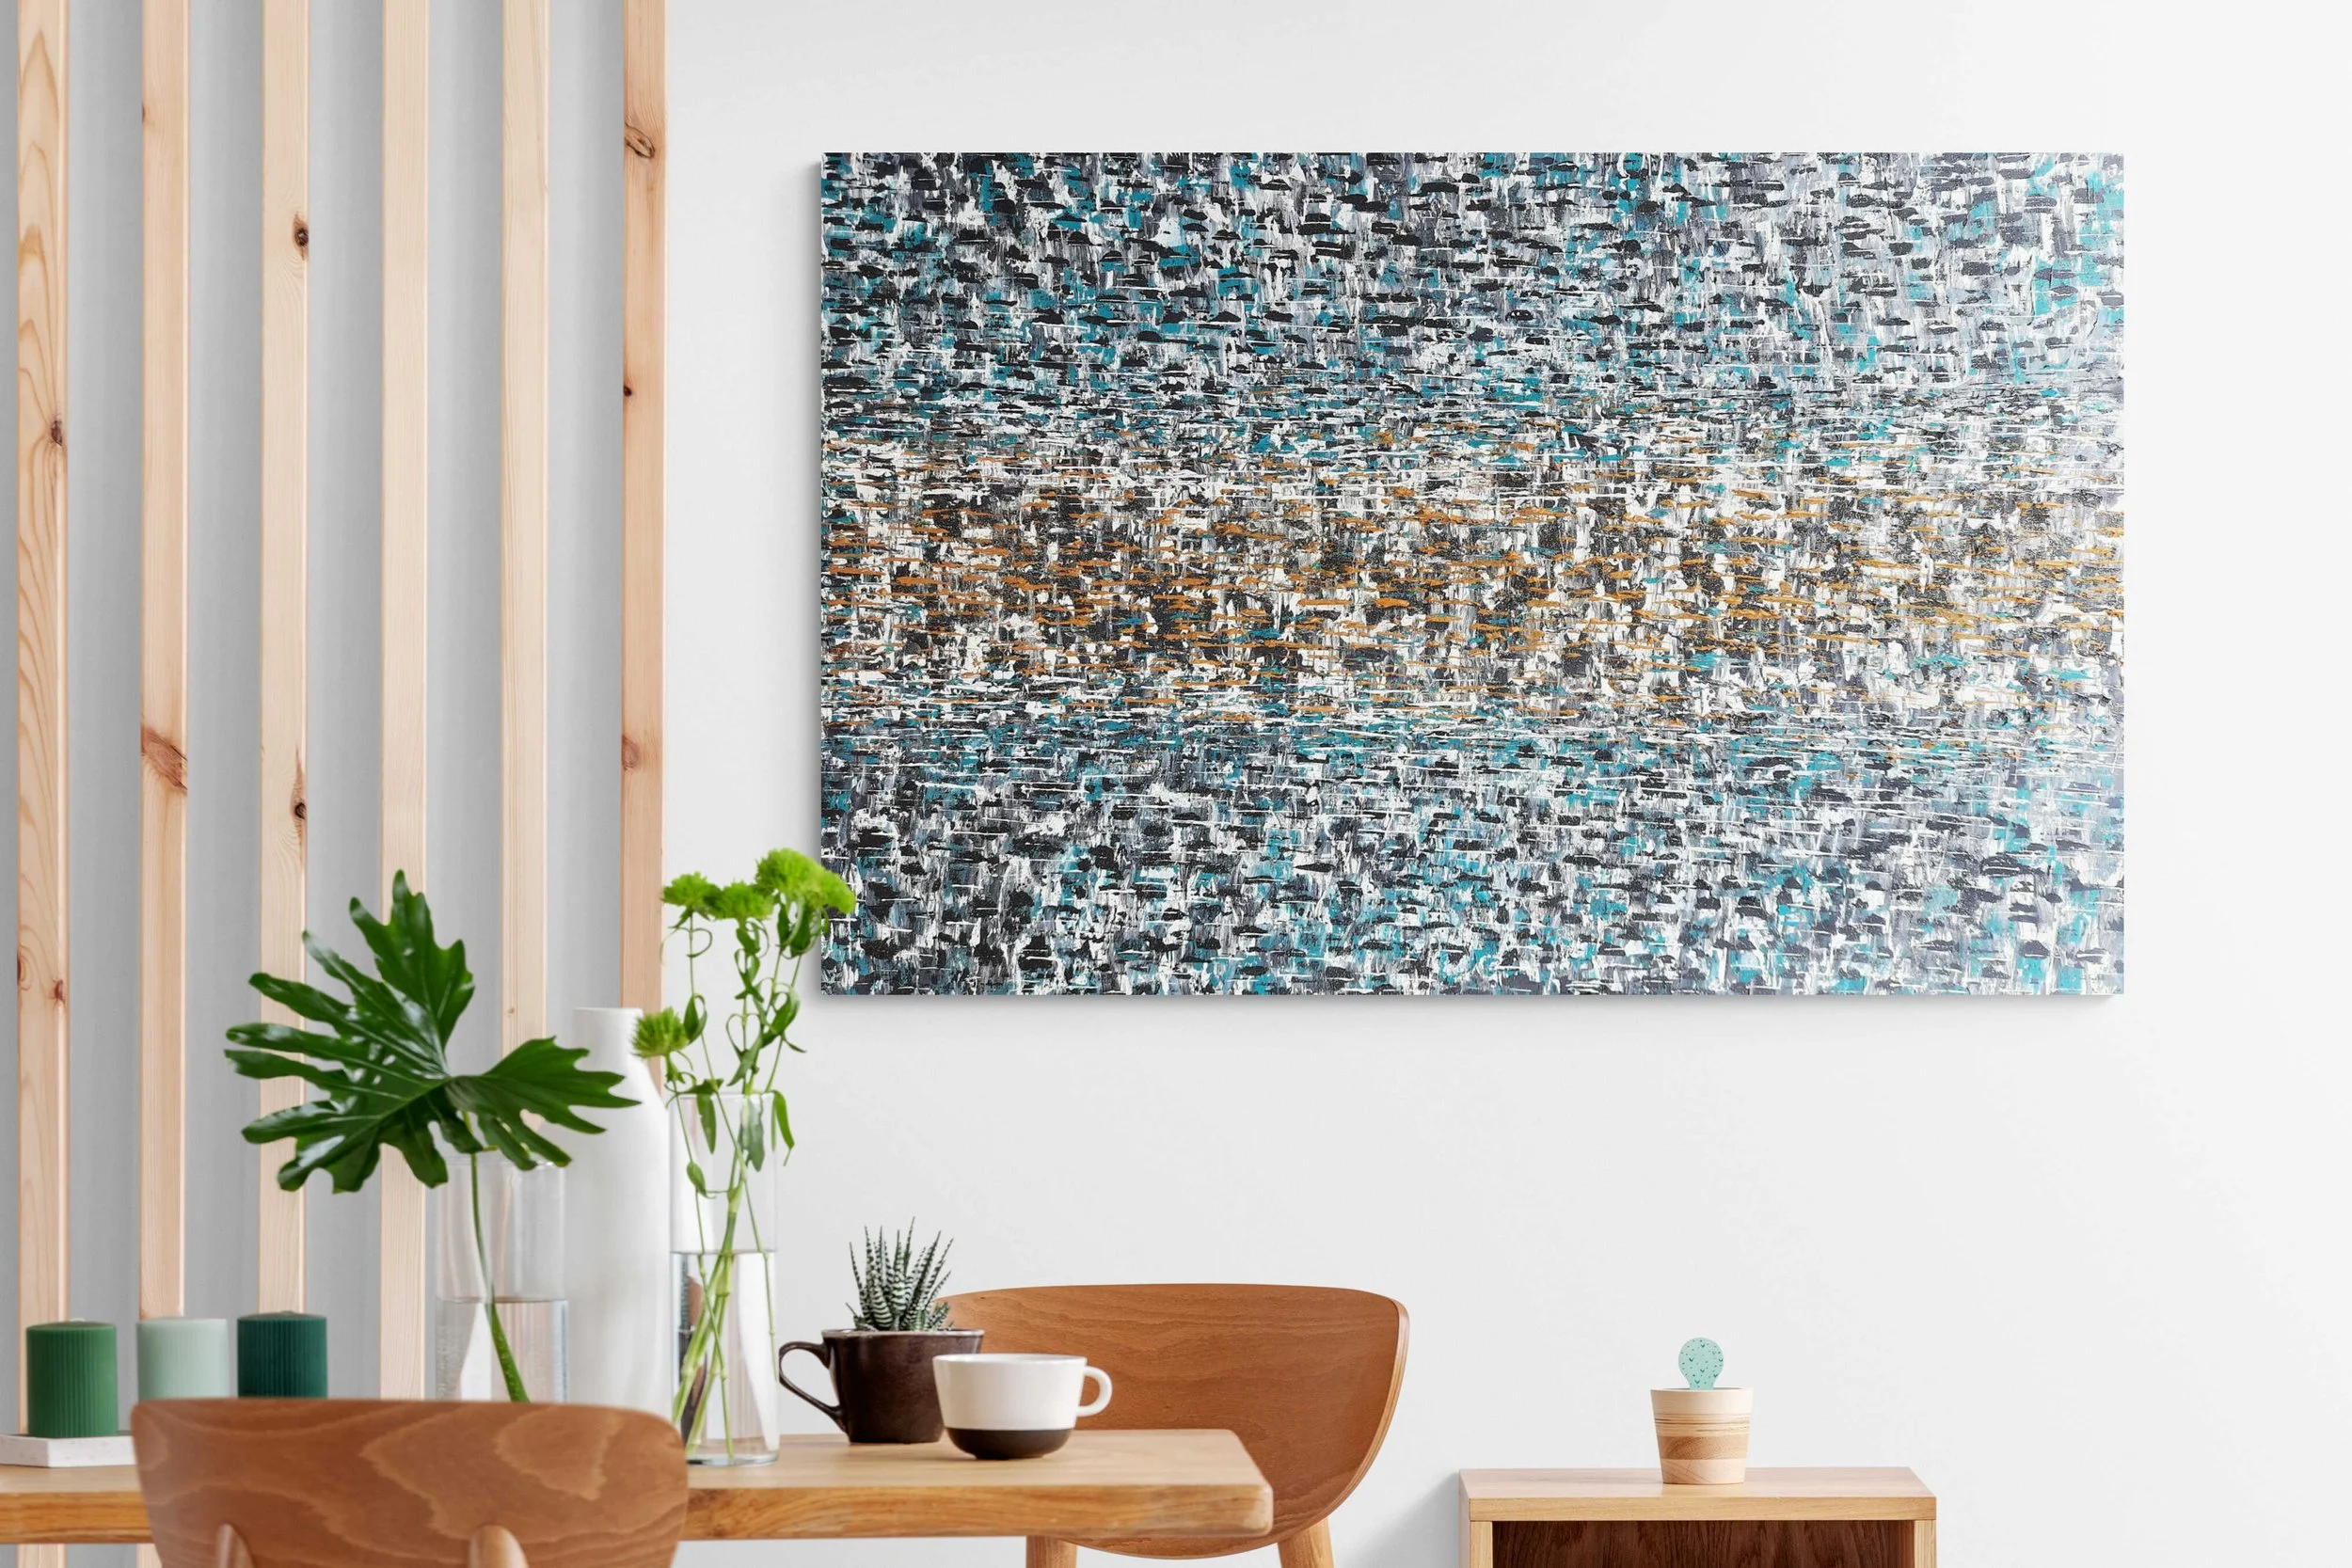
Textured abstract artwork can create a high impact statement and great focal point
Art for your home, office or even home office space doesn’t have to be a large, grand and expensive painting but it should have an impact, After all, you only get one chance at a first impression so make it count. Textured abstract artwork could be the answer.
My latest series of abstract paintings on canvas come in a variety of sizes and not all of them are particularly large. In fact, we often forget the smaller rooms that are the first that guests see when they visit. For example, hallways and lobbies are often neglected when it comes to artwork and yet a small painting could have quite an impact and add a level of interest that was previously missing.
Textured artwork is unique
Textured artwork can bring an interesting new dimension to your decor.
Textured artwork is less well known compared with the more traditional paintings featuring abstract designs. This means that if you look for something textured you can be quite sure that no one else is likely to have anything similar and certainly not the same.
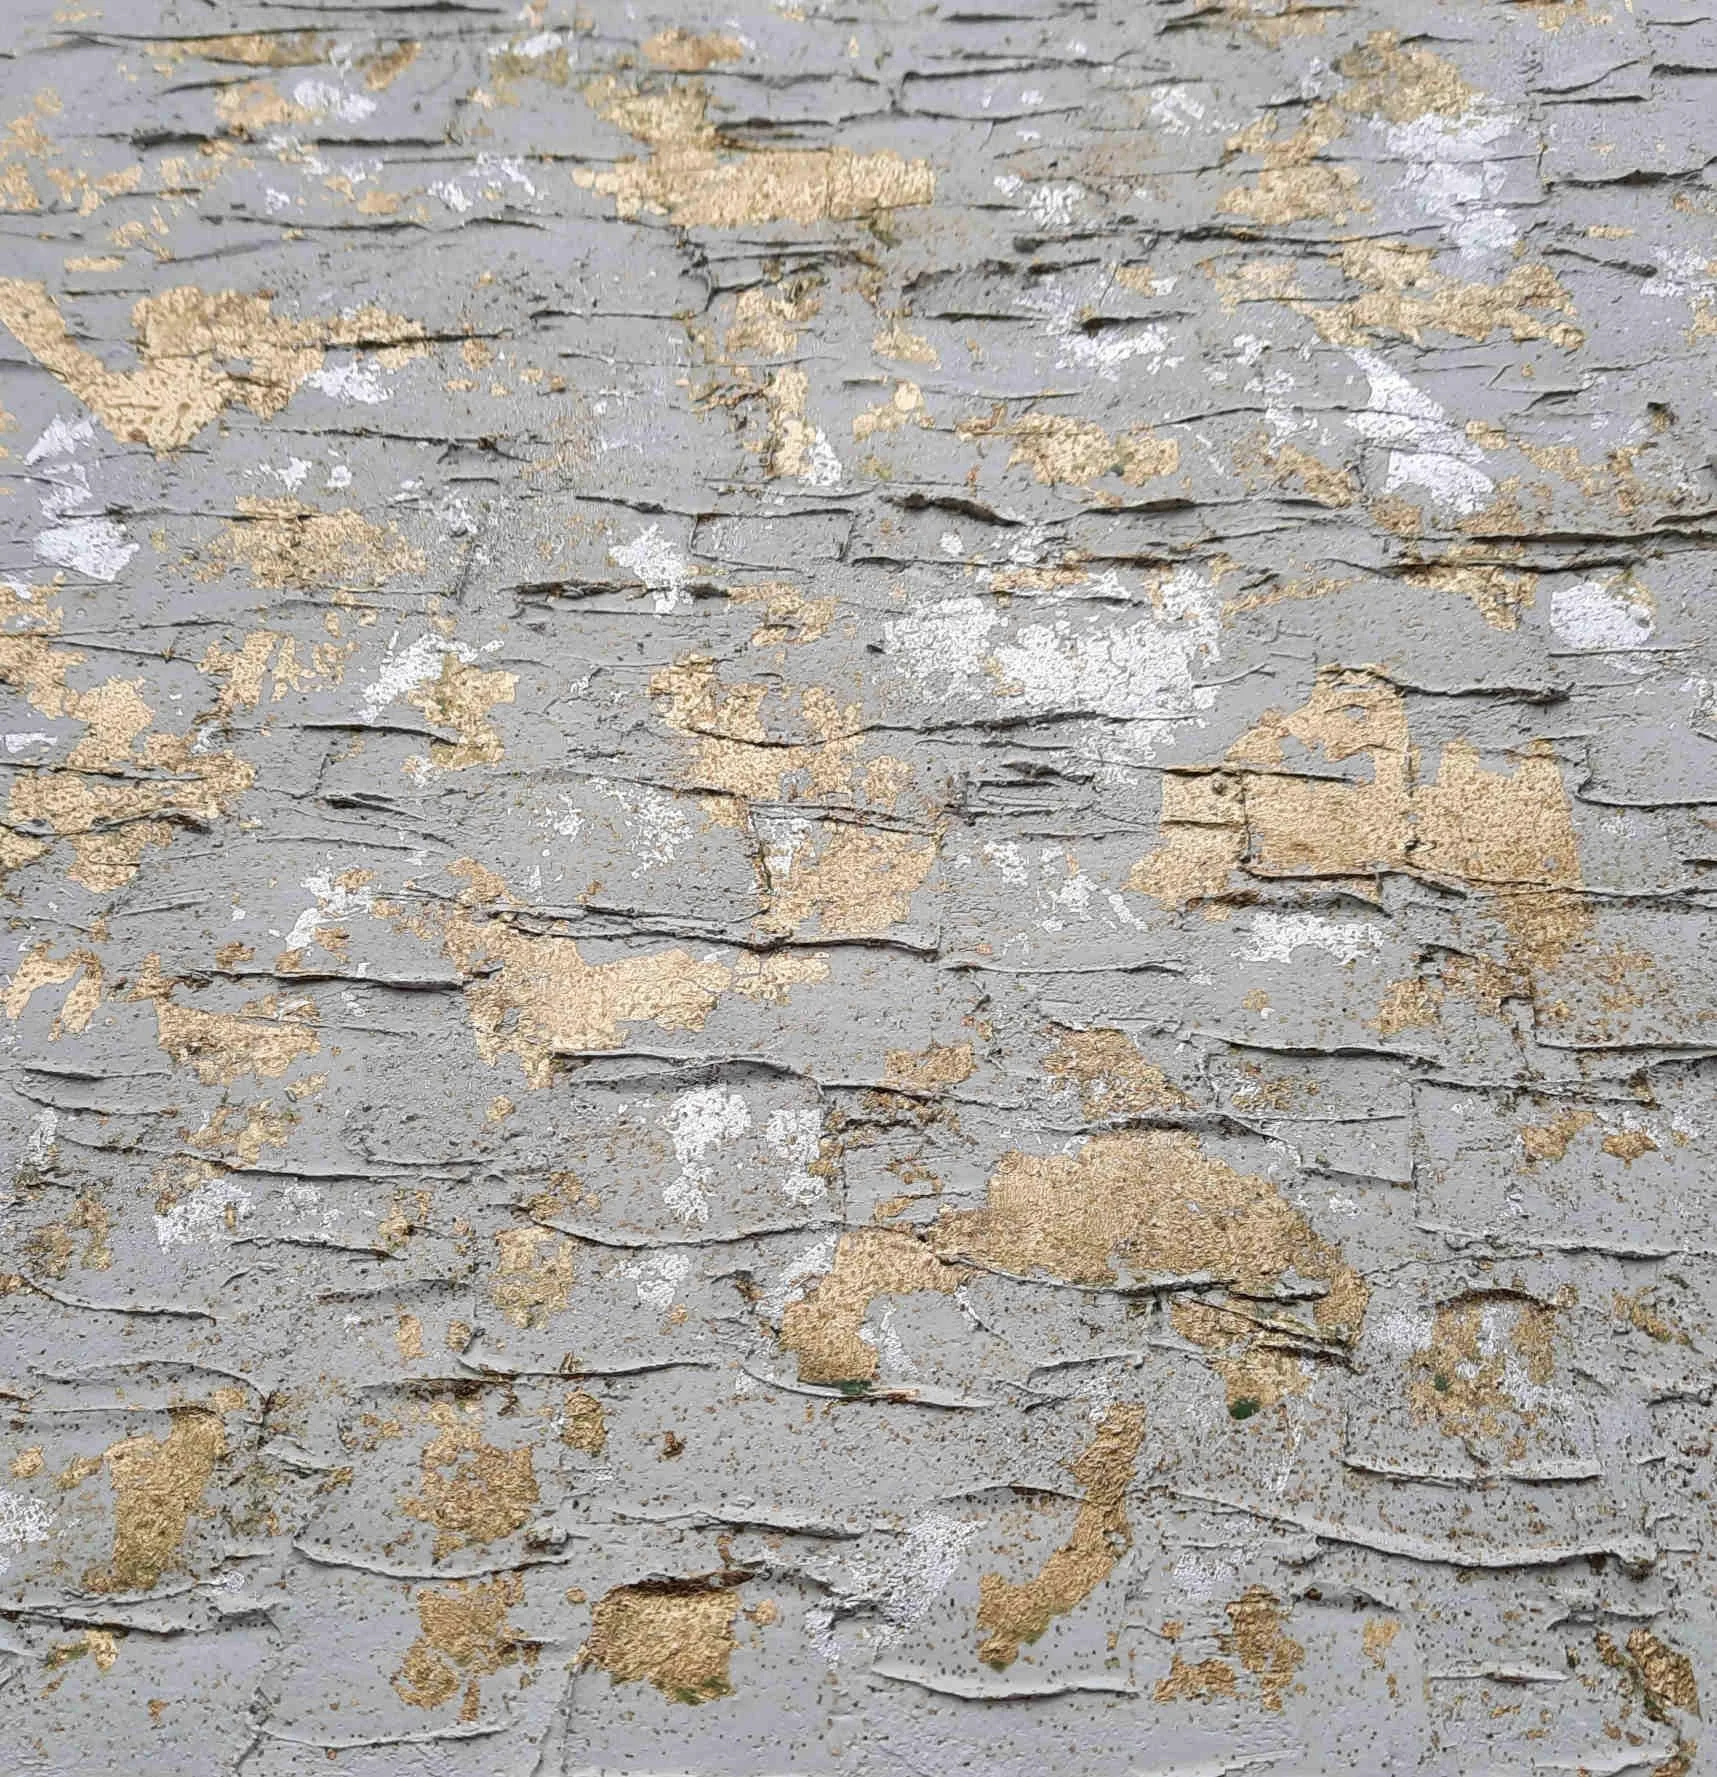
I use a mixture of plaster of Paris, modelling pastes and PVA adhesive with my acrylic paints to create a range of different textures and each painting is therefore unique. The peaks and troughs that result can change a static painting into a dynamic artwork by the way the light changes as the day progresses.
Textured abstract art as a styling aid
Bedrooms look great with calming landscapes or muted abstracts.
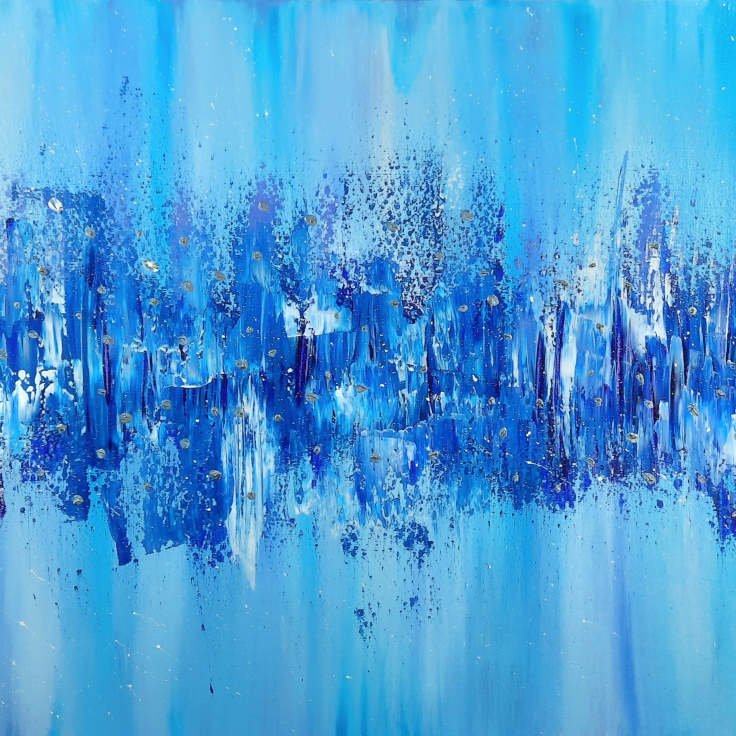
Textured artwork is just as versatile as any abstraact painting and the diversity of colours mean that a painting can be found to meet any decorating idea or design intent. Even subtle textures can bring a painting to life without overpowering it. In these examples silver paint has been added with texturing agents to ensure the silver dots leap off the painting.
Lighting can change a textured painting
The living room can be the most daunting room to place art - everyone will see it!
All paintings will look different under different lighting conditions. Indoor lights tend to lend an orange or green hue to paintings and can therefore mute some colours. Lighting from a window is natural and comprises the whole spectrum of colours and can lead to paintings with primary colours really coming to life as the colours begin to really shine. Textured paintings are no different - they will also respond to changes in lighting but the effects can be more dramatic. Shadows become more noticeable and can really add a new dimension to your artwork.
Textured artwork is dynamic

Textured paintings can create dynamic artwork that changes its appearance as the light changes
If texture is used carefully and thoughtfully, an otherwise one-dimensional canvas can suddenly become 3-dimensional, vibrant and completely dynamic. Shadows will move if the sun is allowed to play on the surface of the canvas and if top or side lighting is used very different appearances can be achieved from the same painting.
Check out my latest series of textured abstract paintings or contact me to discuss an affordable commissioned painting.

How to make an abstract painting - have fun and make your own abstract art
What makes abstract art interesting and desirable such that someone will want to part with their hard-earned money and have it displayed on their walls? Read my seven secrets (not so secret!) on how good abstract art is created - there is actually a thought process behind most of them!

What makes abstract art interesting and desirable such that someone will want to part with their hard-earned money and have it displayed on their walls? I once thought that abstract art was just some pretentious nonsense whereby someone randomly threw paint across a canvas, mixed it up a little, stepped back, and called it art. I also thought artists could get away with this because one often heard people saying that it was for the viewer to decide whether or not they liked it and considered it art. Well, it turns out that there’s actually a lot more to it than that, as I’ve discovered since straying into abstract painting and finding that I love it. But, it isn’t random paint throwing. Here I highlight some of the things an artist, or me at least, needs to think about before creating an abstract painting.
Plan the painting
Before starting, one needs to consider what size of canvas will be used. This might seem obvious but it has a major impact on how the paint is going to be applied, whether a drying retarder will be needed, the size of brushes to use, and how long you’ll need to paint. It will also affect how you paint as very large canvasses may need quick and bold brushstrokes or other techniques to allow the paint to be worked before it begins to dry.
2. Consider Composition

Some abstract paintings may look random and chaotic but most good ones tend to be designed to have a focal point or a way of leading the viewers eye into the painting. With some, the focal point may not be obvious, especially with paintings where very subtle grading has been used but even here the gradient tends to lead the eye. Photographers are well aware of the Rule of Thirds. This is a way of considering an image in three sections to provide balance and is, in fact, routed in nature. For example, a well balanced landscape painting tends to show one third land and two thirds sky or vice versa. Vertically, one often sees trees being included to the left or right third of an image, again to lead the eye. This is also true in abstract paintings where the composition may be designed such that the elements are built around the same idea. Some of my more successful abstract paintings have been those where the Rule of Thirds was employed. Take an image that runs diagonally across the canvas. Here you have a top and bottom section separated by the diagonal feature - three elements and the diagonal leading the viewers eye.
3. Balancing the Blues - Colour Balance

Unless you are incredibly famous and your followers will swallow anything you do without question, you really need to think about colour. Now, this is quite ironic that I'm going to talk about colour when I can barely recognise more than a few, being profoundly colour blind! However, bear with me. Most people are familiar with colour charts or colour wheels, the sort you often see in furniture and upholstery shops. The idea is simple: all colours have a complimentary or contrasting colour associated with it and by combining these you can achieve a colour balance that is pleasing to the eye. Equally, using different shades and hues of the same colour can also provide a balanced image rather than some discordant chaotic mess. Unless ghats what you want, of, course!
I occasionally post my initial progress on a painting and if you’ve seen them you’ll know that I like to lay down my dark colours first and gradually blend in or build up colours that get progressively lighter but also compliment each other. Sometimes this is done across the painting so one part will balance with another.
Top Tip: An artist friend once told me to photograph my painting in black and white and review the image before deciding the colours worked. If the image looks flat and washed out then it suggests there isn’t enough depth of colour or contrast in the painting. Being unable to see colours well I find this tip invaluable and I highly recommend it.
4. Flip your Focus

When painting anything, but especially abstract art, it is always good practice to take a step back for a while and evaluate what you’ve done. Moreover, turn the painting over, 90 degrees and 180 degrees. If the painting looks unbalanced in any one direction it may well be unbalanced in all directions. Even an upside down landscape still holds its balance (rule of thirds, remember!).
What you’re looking for is to ensure all of the elements of your painting work together and not against each other. You’re not looking for exactness or necessarily symmetry but you do want an overall composition that blends together so that you are not mounting a visual assault on your viewers eyeballs!
5. Edge your bets
Easily forgotten but vitally important are the paintings edges. Edges play a role in anchoring your composition and can be used to create striking effects. In fact, some artists use the edges to deliberately strike an imbalance in the painting, which of course forces the viewer into the centre to find the balanced composition. It’s a bit like building a tunnel to draw people in. Edges csn also be used to give the suggestion that there is more of the painting off the canvas. This concept is clever and can leave a viewer pondering what’s out there beyond the edge of the present canvas.
6. Park Precision
One of the fun aspects of abstract art is to ensure that there are a diversity of features to explore on the canvas. When I first started painting abstract art I was obsessed with getting my blending precise and my brush stroke lines all equal and even. This led to some very boring pieces! I’ve since learnt that variety is key and I no longer shy away from letting the painting take twists and turns here and there. If my brush stops dead on the canvas some dramatic, but subtle, marks remain and this adds to the drama on the canvas. If some of the underpainting pulls through the surface this is fine too. When I step back the painting works and when I step closer there are things to be found. It all makes for an interesting painting. Precision is great and sometimes essential but not so in abstract art, at least not mine.
7. Don’t Discard Disasters

Mistakes will happen. It’s just a fact of life and most certainly a fact of creating art. I learnt the hard way that if something goes wrong, at least with abstract work, it can pay to just carry out and go with it. Early on I created a piece that was one of my first attempts at complex blending. The colours were contrasting and really quite offensive on the eye. Worse yet, the centre of the painting drew one in like the centre of a dark and forbidding black hole. I actually felt uneasy looking at it. In trying to salvage something out of the wreckage that was now my artwork I decided to etch the surface with radial lines - it looked like a spider web and only served to make the painting even more creepy.
So what did I do? I ran my largest brush over the lot and wiped it out and etched a large tree into it! The tree sold within a couple of weeks. Great result, right? Not quite. Just because I hated it didn’t mean others would. And others didn’t hate it. In fact, they loved it and wanted to buy it. Awkward, as it no longer existed. Luckily I take high resolution images of everything I do so can at least sell prints and canvases of it but it’s not quite the same.
So, the moral of this story is don’t throw away something in your abstract works just because you think it’s gone wrong. It is highly likely that someone out there will think it’s great. I now keep everything! Thankfully, my stock of “also rans” is very small!
I hope my 7 tips help you to understand what lies under the bonnet (hood) of an abstract painting but if you’d like to know more about my process follow me on Instagram (@awberyart) where I often post my works in progress or visit my YouTube channel to see some of my works in action.
If you enjoyed this blog let me know with a comment and sign up for my free two-monthly newsletter.

How to choose art for your home
Every home will benefit from having some form of artwork displayed and paintings are especially good at adding character and personality. It is entirely possible to buy original artwork without breaking the bank and create a bespoke look in any or every room of your house. And the best bit, artworks are decor that you can move around, take with you when you move and they may even increase in value over time. So how do you choose the right artwork for your home? Here I offer my suggestions on what to think about for various rooms in your home.

Every home will benefit from having some form of artwork displayed and paintings are especially good at adding character and personality. I find it frustrating when I see cheap posters or canvases, that one can buy in DIY stores, hung in people’s homes. These products do not really give a hint to the owner’s personality and are more often than not simply bought to fill a space. But, it doesn’t have to be that way. It is entirely possible to buy original artwork without breaking the bank and create a bespoke look in any or every room of your house. And the best bit, artworks are decor that you can move around, take with you when you move and they may even increase in value over time. So how do you choose the right artwork for your home? Here I offer my suggestions on what to think about for various rooms in your home. If I convince you that you need art in your life then consider visiting my website and taking a look at my very affordable paintings (and they are growing in value all the time!).
The Kitchen

The kitchen is often forgotten as a place to display artwork.
I’m going to start with the kitchen. Why? Because it seems to be the least favoured room in the house when it comes to artwork. At most, one might see a large vase and some flowers but these do not last long and I can imagine that there are many days when there are no flowers at all. But artwork, well that remains and can brighten up any kitchen, even the smallest.
There seems to be a trend these days with building developers to design houses that are not designed for cooking in. The kitchens seem to be an afterthought and are often very small. I’m beginning to believe that the developers have shares with Deliveroo or Just Eat and are encouraging home buyers to simply order takeaway dinners. The trend also seems to be towards very clean-looking kitchens with bare bright walls and similarly muted cabinets. Where has the colour and character gone? Well, all is not lost and abstract art can save the day.
Admittedly, abstract art might not be everyone’s cup of tea - it certainly wasn’t mine originally. In fact, once upon a time, my wife took me to the Tate Modern in London to look at abstract art and I lasted five minutes before walking straight out and headed for the natural history museum. Well, you know where you are with rock! But I digress. The point is that abstract are comes in many forms and there is almost certainly going to be something that would work for you and brighten up even the smallest space in your kitchen. And your choice of painting will tell a lot about you as an individual so your kitchen becomes more interesting. Back in the days when we could visit each other’s homes and have parties, wasn’t the epicentre always the kitchen? Now you’ll have a talking point if the conversation runs dry!
If you have limited space look for abstract paintings on stretched or box canvas (also known as gallery canvas). These do not need frames and can be hung just as they are so they are no-fuss solutions and look great.
The Bedroom

Bedrooms look great with calming landscapes or muted abstracts.
Bedrooms are supposed to be where you go to relax before eventually drifting off to sleep, so it makes sense to choose paintings that have a calming or soothing appearance. This is not the room for those loud and dynamic abstracts! If you have space, a large landscape-format painting hung above the headboard looks great as does placing artwork on the wall directly opposite the bed. Of course, with anything hung at the end of the bed you need to choose wisely - you are going to be seeing it every morning!
Seascape paintings can look great in bedrooms - the sea seems to have a very calming effect on the eye although I’d suggest you avoid the depictions of ships crashing onto rocks in a storm unless you find that relaxing. Cityscapes work well and especially those depicting nighttime with the soft glow of city lights. Abstract paintings also work well here but you really want to aim for more muted or desaturated colours. Abstract art is especially versatile here because you can pick out particular colours from your room or soft furnishings and help the painting fit with the overall theme.
Whereas small kitchens do not lend themselves to framed paintings, the bedroom is a great place for framed art. There are so many different types of frames available to suit every taste and budget and again, you can introduce something of your character in your choices with frames and mounts. There are some online companies that allow you to upload your painting as an image so you can see what it will look like in a particular frame. I use EasyFrame but there are probably many others you could use (I’m not paid to say that - they are just really good!).
The Living Room

The living room can be the most daunting room to place art - everyone will see it!
The living room is arguably one of the most difficult or intimidating rooms to decorate at the best of times and then I’m going to suggest that you add artwork to the challenge too. The living room is possibly the most exciting room to decorate with artwork too. I suggested at the start that introducing artwork into your home gives you a chance to show your character and personality and doing this in the living room puts it right out there, front and centre for everyone to see. What’s to be afraid of?
To be fair, other than the time you spend in the bedroom (and most of that is with your eyes closed in the dark) the living room, by definition is where you are likely to spend most of your time at home. As a starter for ten, I would suggest thinking of any artwork as a conversation piece. If the artwork is interesting or unusual it is bound to catch the eye and invoke a conversation, so please don’t pick up the first canvas poster you find in your local DIY store! Think about the setting or vibe you are trying to achieve with the room and choose something that fits in rather than stands out as if it shouldn’t be there (granted, that would be a talking point!).
If you are the outdoors type you might find a large and imposing landscape painting fits in and speaks to your wider interests. Equally, if you travel a great deal, for work or pleasure, old maps set in characterful frames and look great. I have an old map of Europe and Russia and the talking point arises when visitors see it because the countries are not all correct (by today’s geopolitics at least) and the seas have unusual names. In essence, anything really goes in a living room but try to think how a painting reflects something about you or your family.
The study or home office

The home office or study is where you can have some fun with your artwork. Go on, be bold!
With the pandemic forcing many people to work from home and many businesses now looking at new ways of working that may well include a mix of flexible working from home, the home office or study has taken on a new importance for many. To begin with, the home office or study was probably just a spare room or space at one end of the living room but more and more people are designing their spaces specifically for working in (I know I have) and it is important to get the look and feel of it right. But, there is also an opportunity here. In the traditional office setting, one couldn’t simply rock up with a painting and hang on the wall but at home well, it’s your house - your rules, and now is the opportunity to get creative.
As I have said before, your choice of artwork should reflect you as an individual and give an insight into who you are but we all have to limit ourselves to some extent. However, this is not necessarily the case with the home office or study. Largely, it is a dedicated space just for you so why not let go a little and get bold. Have you always loved those bold and aggressive abstracts? Do you find pictures of cute cats relaxing? Maybe you really like those bold semi-nude abstracts that seem to be so popular on Instagram right now (if you haven’t seen them check out Sophie Tea Art who now has a shop in London. I’ve often wondered where that sort of art would be placed and I think the study would be perfect). Whatever you choose is up to you,
If you are limited for space, or don’t wish to put nails in your walls or perhaps you can’t decide what paintings to hang you could try the floating art concept. Put simply, you just prop up your paintings on a mantle, shelf, or desk (whatever you have) and assemble your paintings along the length of your area and allow the paintings to overlap and sometimes stack in front of each other. This then becomes a very dynamic art gallery and you can simply move and swap paintings around whenever you want, so no getting bored of the same old scene. I actually do this in my home office (I have a lot of paintings!) and I find it relaxing to have something new to look at each day. Okay, I should be working and not worrying about what I’m looking at but once an artist…you get the idea!
So there you have it. I hope you’ve found this useful and do leave a comment and let me know, especially if there is another topic you’d like to see covered in a future post. Coming soon will be my argument as to why every home should have abstract art it, not that I’m biased of course!
Finally, if you’ve read this far then thanks - I really do appreciate it. Now go, there’s nothing more to be seen here!

Art and Science Converge - Painting the Periodic Table
Ever seen the Periodic Table of the elements? Can you visualise an element? Well, my latest art project is about to do just that as I aim to create a series of abstract paintings on canvas to represent the Periodic Table of the Elements.
Painting the Periodic Table! It seems that there are thousands of artistic representations of the Periodic Table as a whole but very few artistic impressions of the elements themselves. Being a science geek and an artist, I think it’s high time we rectified that.
The Periodic Table. Almost everyone knows what it is and it’s instantly recognisable. It has become something of a cultural icon, according to chemical philosopher Eric Scerri of the University of California, Los Angeles in the US. Created in 1869 by Dmitri Mendeleev it has been the subject of many artistic endeavours from creating colourful tables to representing each of the, currently, 118 elements in cupcakes. Yes really! However, if you try to find artwork depicting the individual elements they are few and far between. So, I’ve decided to expand my series of abstract paintings, called The Elements, with the aim of representing, abstractly, all 188 elements.
Last year, 2019, was the International Year of the Periodic Table but unless you’re a chemist (like me) I would imagine that this may have passed you by. Still, it’s never too late to do something to celebrate this ingenious system for classifying the elements that make up the natural world.
Earlier this year I started a series of abstract paintings that I titled, rather conveniently, The Elements. Initially, these started out as fairly randomly chosen names but I soon settled on using the names of some of the elements from the Periodic Table. This seems to have been a popular move and, after a suggestion from a friend in the US, I’ve decided to repurpose my series and try to represent all 118 elements in abstract form.
Of course, the beauty of doing this in abstract is that I can’t get it wrong! Everyone will see something in abstract art and it’s likely everyone will see something different. That’s why I love abstract painting so much - there’s always something for everyone!
Here you can see my first three abstract paintings in the series. All are 8 x 8 inch on nearly 2 inch thick box canvas. They can be hung as they are but would also look great in a black floating frame. They will all be available from my shop as I create them. You can explore the shop here.

Zenon

Mercury

Neon
What is the Periodic Table of the Elements?
Okay, so I’ve assumed right from the start that just about everyone has at least heard of the Periodic Table but it might be a stretch to assume that everyone actually knows or understands what it is. As a Chartered Chemist I feel it’s my job to educate you on this!
The Periodic Table is a systematic way of displaying the chemical elements, which are grouped according to atomic number, electron configuration and similar chemical properties. The elements are arranged in 7 rows (periods) and 18 columns (groups). Metals (e.g. sodium) are generally on the left and non-metals (e.g. oxygen) are on the right. The columns tend to represent similar chemical behaviour but also reflect differences in reactivity - just recall your school days of reaction sodium and potassium. This also means that chemical behaviour can be predicted for elements yet to be discovered or isolated.
Currently, there are 118 elements on the table but this wasn’t always so. Although the basis of the modern version was built on Mendeleev’s table from 1869 the work to classify the elements actually dates back as far as 1789 when Antoine Lavoisier built his table of just 33 known elements.
Of course, regarding my planned art project I would probably have been happier with Lavoisier’s version as I’d have a lot less to do! As it is, I have another 115 paintings to create so that should keep me out of trouble for a while.
How will I represent the individual elements?
My initial abstract paintings were clearly very popular and the three that are shown above will be the style I intend to use. But, I feel that I need to be able to show some indication of a difference between each painting as they represent a different element. So, my plan is to paint the radial lines that emanate from the centre but include a special larger radial line or lines to represent the atomic number of the element being represented. It’s probably not easy to imagine so just trust me and follow me to see what I mean. Wish me luck!

How to Price your Paintings so your artwork will sell - in 7 easy steps
Assigning value to your own paintings is often difficult and setting a price on artwork can be a challenge. Here I explain how a simple formula and some research can help and keep emotions put of the calculation. In a hurry? Here’s a summary for you:
Price up material costs (point 2)
Price up your promotion, advertising and website fees (point 3)
Price up your sellers transaction fees (point 4)
Price up your postage and packaging costs (point 5)
Price up the size of your painting (point 6)
Check your pricing (point 7)
So, you’ve finished painting and your artwork is ready to be sold, but how do you value your work and set a fair price? I’m not selling a secret formula nor am I going to tell you some complex method. Here, I ask and answer the questions you need to know to be able to price your art to sell. Simple!
In a hurry? Here’s a summary for you:
Price up material costs (point 2)
Price up your promotion, advertising and website fees (point 3)
Price up your sellers transaction fees (point 4)
Price up your postage and packaging costs (point 5)
Price up the size of your painting (point 6)
Check your pricing (point 7)
1.Why do you want to sell your painting?
This may seem like an odd question but if you are just creating art as a hobby and hoping to sell the fruits of your labour your motivation will be very different to someone wanting to make a living from their sales. For the latter, you will want to be paid an hourly rate whereas a hobbyist is less concerned with the value of their time, after all, they are creating during their free time!
Personally, although I now sell my artwork on a regular basis I don’t charge by the hour. I find this unfair because I might find that I’m a very slow artist compared to others and I would therefore be charging unfairly high rates for my slowness - hardly fair on the customer! On the other hand, I might be very fast and then underselling my work! I’ll come back to how I charge later on. (if you can’t wait go straight to point 6!)
2.How much do your materials cost?
A really good habit to get into from the start is to keep records of everything you buy when you create artwork. I didn’t at first and it created all sorts of problems later on. I keep a folder for all of my receipts (which I number sequentially) and a log book (just a spreadsheet in Excel) to make a note of the following information:
Receipt Number
Date on receipt
Merchant or shop name
Details of the materials purchased
Net cost
Tax
Total cost
Trust me, later on you will be glad you did this!
Now, the first value you need to know is the total cost of the materials used to create your artwork. Obviously, you won’t use all the paint in a tube so you need to estimate how much you’ve used and divide the cost up accordingly. Don’t forget to include the following:
Paints
Varnish
Canvas
Primer
Mounts and frames (including fixings)
3. How much do your website, online shop and advertising/promotion cost?
This often gets overlooked but can be a considerable hidden cost that can eat into your profits. It’s all well and good creating art that people will buy but if you have to pay to let people know it exists then that cost also needs to be recovered.
Simply add up the total costs of all of the platforms and services you pay for that directly promote, advertise or support your artwork sales. Make a note of the total cost.
I don’t mind telling you that my total costs amount to around £120 per year and I started off aiming at selling, on average, two paintings a month. So, I simply divided the cost by 12 and again by 2 meaning I add £5 to all of my paintings to cover these costs.
4. How much do you get charged for sellers’ transaction fees?
This is another one that often gets forgotten but can be quite significant. Etsy, Ebay, Square and PayPal are all great but they all charge you for completing a transaction. Don’t forget that with Etsy you are paying both to list your item as well as completing a transaction. The sellers fees are clear to see so look up your costs for the value of the artwork you’re selling and add this to your running total of costs.
5.How much does it cost to package and post your artwork?
It’s a fact that everyone loves getting something for free. It’s also a fact that nothing is ever really free!
From my personal experience, I have found that advertising my artwork with free postage and packaging makes the artwork a lot more desirable and I have gained more sales since removing this as a separate charge. It also seems that Etsy will favour listings that offer free delivery.
I learned the hard way on this when I sold a painting last year and, after buying the packaging materials and paying for postage, I made a profit of just £3! Hardly worth the effort! I so wish someone had written this blog and sent it to me beforehand!
So, make a note of the cost of postage and packaging for each painting.
TOP TIP: Make friends with your local post office and ask them to assess your paintings for size and weight to provide an estimate for postage costs AND NEVER POST 1ST CLASS - seriously, it makes no difference at all to the speed of delivery (an insider tip from the Royal Mail!).
ANOTHER TIP: Buy bubble wrap, parcel paper and card wrap in bulk - it is much cheaper that way and will keep your costs down. I also re-use all of my outer cardboard packaging.
6. How to value your artwork - pricing your painting
Okay, this is really what you wanted to know, isn’t it? As promised at the start, I’m not about to direct you to some random website with a secret formula that you’ll have to pay for. Nor will I insist that you have to sign up to my exciting newsletter to learn my secrets - although I’d love it if you did sign up below and become a subscriber!
I have two charging rates that I use; one for artwork that I produce myself and another for commissioned work where I am working to someone else’s specification.
Pricing my own paintings:
Total cost of all materials and services included postage and packaging
Double this figure and note it. This may seem odd but this will easily cover you for other additional costs such as your tax (see note below) and other incidental costs that you will not have foreseen or realised. This is also a common practice amongst gift retailers, so I’ve been told.
Measure your painting in inches and multiply the height by the length.
Multiply your painting size by a factor.
Okay, this is the nebulous bit. If you had a factor of 1 you would be charging £1 per square inch. For a modest canvas of 16x20 inches, this would cost £320 before even adding your material costs. This might be a lot for a new artist to hope for.
I started off using a factor of 0.15 when I first started to sell and this seemed reasonable and I made sales. My factor has steadily increased as my sales have increased, which is inevitable and expected. Indeed, this is actually a good thing for those that bought my art when it was cheaper - their paintings have effectively increased in value!
Finally, simply add your painting value to your material costs and you have the total cost for your painting.
Pricing my commissions
I use the same calculus as above but I use a higher multiplication factor for charging commissions. The reason for this is that I put a lot more time and effort into these works and they often involve more time interacting with the client to develop the specification and I also produce prototypes before embarking on the final painting. I use the same factor for all commissions regardless of painting style or genre so every client is being treated equally and fairly.
Most of my commission clients are very private about the amount they have paid for their artwork so I will not be divulging my charging rate. I will say however, that I always agree the price up-front with the client and, on the basis that I’ve never had a painting declined, I guess I’m pricing them about right.
NOTE: Currently in the UK a hobbyist or “self-starters” can earn up to £1000 per annum (gross) before needed to register for, and pay, tax.
7. Are your prices reasonable and realistic?
The final thing I do with my painting prices is check them with similar works online. This is relatively easy to do with Etsy because you can search for paintings in your similar style, size and media. Then look at the sellers. It is relatively easy to work out who are new artists (or at least new to selling) and those who are professional or have been selling for a long time.
Rather helpfully, Etsy will tell you how long someone has been on the platform as a seller, will tell you how many products they have sold and also how many positive reviews they have had. You can then read their bio to see if they are in the same place as you, in terms of artistic journey.
Armed with this knowledge you can down-select those sellers that are most similar to you and look at how much they are charging for similar artwork. I review my pricing periodically and have found that this works well and my prices, even though they have been steadily increasing, are still in line with the prices of other artists’ work of similar quality, style and size.
Of course, the final litmus test for any pricing strategy is sales. If people are prepared to pay what you are asking for you’re probably doing it right (or maybe even undershooting a little). If you aren’t making any sales then your pricing may be off. In this case, the best thing to do is ask people - most will tell you if they think you are over-charging.
I hope this is of some help to you and do leave a comment and let me know if this has helped or just confused you even more! Good luck!

Hundertwasser - Bringing Colour to the Tate Burghfield (Copy)
Never heard of Hundertwasser? Well, nows your chance to learn just I must in order to meet my art groups latest art challenge to design a mural for the Tate Burghfield!
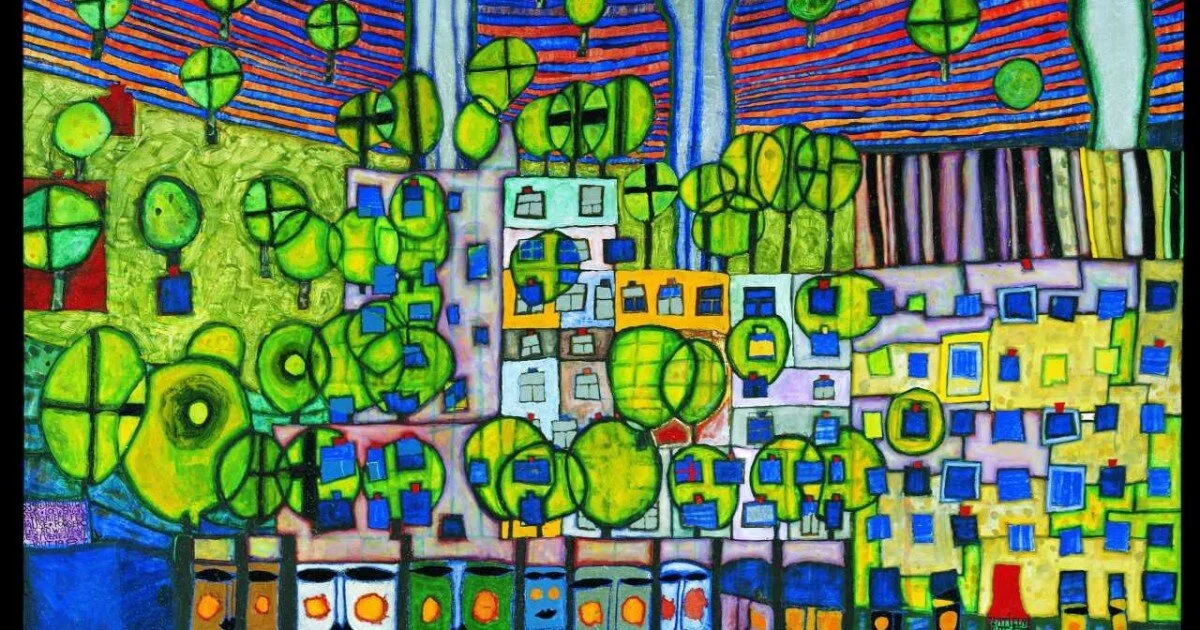
I love my local art group! Not to be thwarted by corona virus they have been coming up with novel ideas to challenge us and to keep the group active, albeit by distance. This week's challenge was to learn about the Austrian artist and environmental campaigner, Friedensreich Hundertwasser and create our own Hundertwasser-themed mural design for a fictitious building, the Tate Burghfield. This could get colourful!
The Challenge
The challenge was to create artwork for a mural for our fictitious new art gallery to showcase all our lockdown art. Here’s the brief:
The new Tate Burghfield building will be based on the architecture and philosophy of artist and environmental campaigner Friedensreich Hundertwasser (1928-2000). Plans for the overall building design are at a late stage and it will be similar to the Museum Hundertwasser in Vienna, with trees and plants built into the buildings facade. However three areas of the building have yet to be designed. Burghfield Art group have been asked to come up with a Hundertwasser themed mural to adorn either a courtyard, a bathroom or the cafe wall, your choice. His artworks are wonderfully colourful, playful and have a mosaic quality to them. Comparisons are often drawn between him and Klimt. Hundertwasser used a variety of media including coloured pencils and recycled materials so really anything goes.

The Hundertwasser Museum in Vienna
Who was Hundertwasser?

Born in Vienna on 15 December 1928 as Friedrich Stowasser, he was better known by his pseudonym Friedensreich Hundertwasser. Hundertwasser was known for his artworks, architecture and his writings. His artwork had a clear style of its own and he was opposed to straight lines or standardisation, which resulted in his unusual and easily recognisable style. He was said to have described straight lines as godless and immoral! This is perhaps why so much of his work uses spirals and other fluid forms and shapes.
There is a really good summary of his life and works on the Hundertwasser official website so I won’t go into detail here but it is well worth a read.
Suffice to say that Hundertwasser’s work has featured widely all over the world and influenced many other artists who followed him. You may have seen evidence of this without even realising it. Hundertwasser died in 2000 whilst on board the QEII and is buried beneath a tulip tree in New Zealand.

Why I’m painting more mini abstract paintings
Abstract paintings are hugely popular right now and I've made mine very affordable. These mini-abstract paintings are just 20 x 20 cm and would look great in any home or office. Original abstract artwork is highly collectible and this series, The Elements, have all sold out which is why I'm creating more.

The Elements mini-series returns!
Another chance for you to buy these hugely popular abstract paintings before they sell out again.
My hugely successful series titled The Elements included these framed square mini abstracts and they were so popular that all sold. In fact, the last three sold before I’d even finished! So, back by popular demand the mini series is returning.
I really enjoyed painting these and each one is entirely unique but still easily recognisable as part of a defined series. The paintings can be bought individually but also look great as a set, as shown in the picture above when all three of these went to the same home. All of the paintings can come framed in black or white floating frames and come with a Certificate of Authenticity.
Since starting to sell my artwork last year my prices have inevitably increased in line with both demand and the complexity of the pieces I produce. So, although my paintings may not be as cheap as they once were you can be sure that each painting will be a great investment as the value continues to climb. Go on, why not treat yourself?
The new series of paintings are not yet available on my online shop and the last ones sold out before I’d finished painting them. So, if you’d like to buy one just let me know and I will happily reserve one for you.

5 Ways to Promote your Paintings
Want to drive more traffic to your website or gain more followers? Me too! Here are my insights into five social media platforms for growing your art business.
Being an artist isn't just about painting, well it isn't if one wishes to sell successfully. I've been learning that one must embrace social media and the learning curve is steep. I can now see why people get degrees in this stuff! Here I provide my insights into five platforms I've been using.

Small acorns? Building my Pinterest following.
In my current lockdown world I've managed to prepare badly and have just about run out of art supplies. So, not to be idle with my artwork I decided to research how to improve my presence on the internet. Here are my five insights with my two favourites at the bottom.
Pinterest
I'm slowly learning to love this platform but, to be fair, it isn't really social media as it's more of a visual search engine for ideas and inspiration. I was interested to read articles that claim many people choose their purchases based on Pinterest research. Ive been using Pinterest for a few years but mostly to collect recipe and holiday ideas. It's only in the last 6 months that I've changed to a business account and started to really understand it. Don't get me wrong, my account still needs a lot of work but it's better than it was!
What I have discovered is that if one pins regularly, like at least twice a day, then followers grow more quickly and the number of views dramatically increases. Now, I'm less concerned about the number of impressions or page views because this is really just s vanity metric. Just because my pin has appeared on someone's screen doesn't mean that they were actually engaging with my pin. But, the more exposure one has the greater the chance of positive engagement. I may only have less than 300 followers but I value them greatly and some have turned into buyers.
However, I think from my research, that Pinterest is the key platform for driving traffic to my website and products and for that reason I've gone all in with developing it further. I'll write a separate post on this later but suffice to say, I now know that I need to be pinning several times a day! Thankfully, the scheduler, Tailwind, is perfect for this, or at least it seems to be. I've only just started using the trial version for free (first 200 pins free) and it's about £10 per month thereafter. I'm emracing it and, if it grows my following as I hope it will, then this may well turn out to be my favourite.
Instagram
I love Instagram! I've only been using this platform for about a year in terms of promoting my artwork and it has already rewarded me with sales. I wanted to grow my following organically so I haven't used any methods that grow followed fast. Instead, I've worked hard to properly look and read others posts and comment on them - getting a dialogue and a connection is essential. I've found that if engagement is done well then those following those you engage with are more likely to follow you too. I don't follow others just because they follow me - I want to be seen as someone who follows great content. It's a slow process but I appear to have genuinely interested followers and good engagent some of which have converted to sales. I've not yet hit the 1k followers milestone but I'm getting closer. For me it's really about quality of engagement and not the total number of followers.
One final insight is that I have learnt that posting everyday on Instagram is a must and twice, for me, seems ideal: in the morning and late evening. My mid-afternoon posts never seem so successful. I've got a lot more to learn with Instagram and I'll keep with it, especially now I've learnt how to do 60 second micro video blogs! There's just no stopping me!
Facebook Marketplace and Groups
Facebook has been great for initially telling people about my artwork but I've discovered that it doesn't take long before your friends and contacts lose interest or the Facebook algorithm limits your exposure. To improve matters I joined a number of marketplace groups. This did result in some new sales but I found it time-consuming and clumsy to keep posting my products into individual groups. I still maintain a presence and occasionally post to the group's but it's not my priority right now.
4. Twitter
I have to be honest and say that I've not really had a lot of success with Twitter. In over a year my following hasn't reached 200 despite posting regularly and trying to engage and use the right hastags. I'm sure it works for others but so far I've found it of almost no value. Perhaps I'll have to review my strategy.
5. LinkedIn
LinkedIn was my wild card option and it turned out to be surprisingly effective, albeit on a small scale. My account is mostly associated with my full-time job as a scientist so my connections are mostly in the science or managent fields. However, I decided to post some of my work and have actually sold quite a few of my paintings through these connections. To be fair, I should probably set up an account specifically for the art business but for now, if it's not broke…

10 Tips for the Self-Taught Artist
One doesn’t need to go to a prestigious art school or have a master artist as a mentor to become a good artist. I’m completely self-taught and have regular sales and commissions. Here are my top ten tips for becoming a successful self-taught artist.
One doesn’t need to go to a prestigious art school or have a master artist as a mentor to become a good artist. I’m completely self-taught and have regular sales and commissions. Here are my top ten tips for becoming a successful self-taught artist.
1. Pick up your paintbrush and paint!
It’s stating the obvious but if you want to become a successful self-taught artist you need to paint and paint lots! I started out by painting every day for 30 days and haven’t stopped since. Self-teaching means learning as you go and you need to paint as much as you possibly can with different techniques, different brushes and different subjects. By doing this you will learn what you’re good at and, more importantly, what you’re not so good at and need to work on to improve.
You are likely to find that there are some things you just can’t get to grips with or don’t understand how to get the effect you’re after (or trying to emulate if you’re trying to create something you’ve seen before). When this moment comes, and it will, it’s time to get outside help to develop further and tip 2 kicks in…
2. Read and watch lots
When I first picked up a paint brush I had no idea what I was doing. My first effort (which you can see on my 30 Day Challenge Story) was awful and I decided that I need to find out how to paint. The wonder of Google presented me a myriad of articles on painting techniques and information on what brushes did what and how to use them effectively. I also watched videos - a lot of videos - on YouTube. Be warned, some are good and some are bad, so be selective! Finally, I bought a lot of books too.
The scientist in me has a tendency towards research so it was quite natural for me to research painting to help me understand it and determine which direction I was going to go in. It was through this that I knew I wanted to start with water colours and progress to acrylics.
3. Practice on a small scale
This is perhaps my favourite tip because it facilitates keeping you painting. If you are looking to develop as a self-taught artist don’t be drawn into trying to paint large complex paintings that you might find on YouTube tutorials. You could spend weeks working on a complex painting only to be disappointed with the results. And on that note, don’t think you are going to become Bob Ross overnight because you followed his video!
My tip is to keep a good stock of small canvases and papers to practice on. I often try out new ideas and techniques on 8x8 inch stretched canvas or A4 sized water colour and acrylic paper. By doing this it means you have time to finish whatever you are trying to create and the smaller space is more forgiving. Also, if you make a terrible mistake you can simply gesso over the canvas (with acrylics anyway) and start again. My practice pieces are never intended to be sold (no matter how good I think they might be) and are there just to let me try things out.
4. Be your own worst critic
It’s very easy to sit back and think you’ve created a masterpiece but in order to learn and improve one needs to learn how to review one’s artwork without bias, which is not always easy. Of course, you may be inclined to think your work is the best it can be and this can prevent you from seeing any obvious flaws or identify weaknesses in your ability or technique.
I know that I am overly critical of my own work and genuinely believe that I haven’t yet created a painting that I am truly happy with. To get around this I have stopped relying on myself and get a second opinion - well several actually.
5. Canvas the opinion of others
It’s one thing to be overly critical of your own work, or worse, too praising of your own work. It’s quite another to solicit the opinions of others and it can be brutal. I found that many of my friends were very complimentary about my work even when I knew there were major flaws evident. Some friends, however, can be very direct and were genuinely kind enough to be blunt and tell me when things were not quite right. I also started to show some of my apparently finished paintings across my social media platforms - strangers can be incredibly honest when you make it clear that that is what you are looking for. I’ve had some equally blunt feedback which has helped me enormously. I will be honest though and say that one has to develop a thick skin at times!
6. Be open-minded
When I first started painting I was fairly sure that I really did not like abstract art. In fact, some years ago my wife took me to the Tate Modern in London to see an abstract art exhibition and I hated it! Afterwards, we had to visit the Natural History Museum so that I could see some rocks just so I could feel better! You know where you are with a rock!
About 6 months into my journey as an artist I was asked if I would be interested in painting something abstract for a friend and they were prepared to pay. My initial response was honest and I said that I didn’t like or paint abstract art! My wife kicked me and politely pointed out that I would love to give it a try. The result was my first abstract painting and my first successful sale of one of my paintings!
Since then, I’ve spent a lot of time researching art and reading up on contemporary and historical artists and I now have a much wider appreciation of art in all its forms. I no longer shy away from any genre and remain open-minded when it comes to deciding what to paint.
7. Aim high but be realistic
I firmly believe that one should always aim high in everything one does. However, it is also necessary to be realistic and stay grounded. The art world can be fickle and there are a great many artists out there who may never sell a single painting despite their work being of very high quality. When setting out on your journey as a self-taught artist it’s a good idea to think about where you want to go with your artwork. Do you want to sell or are you just doing it for fun as a hobby? It may be that you start off without the intention of selling (just as I did) but then discover there is a demand for your work. It is then up to you whether or not you choose to embrace that and develop it further.
It’s worth bearing in mind that in some circles self-taught artists are not considered nearly as highly as those who attended schools or colleges so one needs to be realistic in expectation. That said, the 21st century world is powered through the internet and there are many hugely successful self-taught artists selling their work through their own websites or, in some cases, exclusively through Instagram.
8. Copy other artists to learn techniques
Now, for this tip I need to make it clear that I am not suggesting you copy another artist’s work and try to sell it! Instead, what I’m suggesting is that there is a lot you can learn by trying to replicate another painting. You will learn how brush techniques, layering and blending, for example. If you’re lucky you might be able to accurately recreate a piece but that really isn’t the aim. The idea is to simply try to repeat some of the elements so that you learn what needs to be done to get a particular effect.
I used this method to learn how to paint skies with clouds so that they had depth and didn’t look flat and one-dimensional. I have literally hundreds of pieces of paper with prototype skies!
9. Challenge yourself
Stepping out of your comfort zone is possibly one of the best ways to develop as an artist. If you were to attend an art class or a school you might find that you end up painting what you are told to paint. As a self-taught artist you can paint literally anything. However, deciding what to paint can be difficult if you have a tendency to keep doing what you know you’re good at. I found that asking others to suggest topics worked well. I was very comfortable painting landscapes and trees and was terrified when challenged by a friend to paint something else. However, if I hadn’t taken on the challenge I would never have discovered that I enjoy painting snow-scapes and scenes with the northern lights or that I have a flair for abstract art. I sometimes also look at other artists’ work and see if I could do something similar.
10. Put the time in and record everything
There really is only one way to become proficient at something and that is to put the time and effort in. I set myself the challenge from the beginning to paint every day for 30 days. This not only developed painting as a habit (which I now find impossible to break) but it also allows you to develop. Long pauses between painting will inevitably mean that you won’t benefit from the mistakes and the learning that you gain along the way. The mistakes are the most important. As frustrating as it is to make mistakes they tend to be the things we remember and learn from the most and even now I still experiment with different ideas and techniques - sometimes with disastrous results!
Finally, keep good records of what you do. I find photographing my steps helps a great deal, especially if I’ve created something I’m pleased with and want to remember what I did or how I did it. I also keep a notebook to record details about the materials I used. Basically, the better a record you keep the more invaluable it will become in the future as you continue to develop as a successful self-taught artist.

10 things to do after finishing your artwork
Deciding when a painting is truly finished is challenging and I often return to make changes many times before finally declaring it finished. But that's not the end of the work as an artist. There is still work to be done. Here are my 10 tasks to complete before you can say your work is really finished.
Deciding when a painting is truly finished is challenging and I often return to make changes many times before finally declaring it finished. But that's not the end of the work as an artist. There is still work to be done! Here is my top 10 list of things to do after you’ve finished painting.
Check you really have finished
I really struggle with this. I get to what I think is the end only to see some detail that needs attention or something that's not quite right. If I'm honest, I'm not sure any of my paintings are truly finished but one has to stop somewhere!
So, the first task is to hang the painting up somewhere and let it rest for a while. Give yourself a week or two to keep going back and look at it. Are you really happy with it? No, then go back in and fix it. If you can get to a point where you are as happy as you're going to be then you can declare your painting finished. I must confess I find this harder to do with detailed paintings such as landscapes and much easier with abstracts, which I think are more forgiving.
2. Finish the edges
This task has caught me out so many times. I'd finished my painting and left it on my studio wall waiting to be sold when the sale comes and I realise that the painting looks untidy and unfinished. Panic! I now have to ask the customer if they want to frame it or wish to hang it as it is. If the latter then it's going to need some work.
Generally, if painting on stretched canvas with narrow edges I simply finish off by painting the edges in black or white or, sometimes, the dominant colour in the painting. I certainly don't try to wrap the picture around the edges of the canvas.
If I've painted on a deep-edged box canvas I tend to be thinking ahead and decide early on whether to wrap the image around and therefore paint the edges as I go or decide to just use a solid colour as with the stretched canvas. Either way, a box canvas is far less forgiving because these tend not to be framed.

Unfinished edges on stretched canvas - fine if you’re framing.
3. Sign your painting
Signing your painting should be the last time you touch it with a paintbrush. I try to be absolutely certain that I'm finished because, for me, signing is a symbolic moment of closure.
Signing might seem simple but painting a signature is not as fluid and natural as it is when you sign with a pen on paper. It is usual to sign using the same medium you painted with but you may need to dilute the paint to help it flow. The colour matters too. If you have a very dark painting you won't want to sign in titanium white! I try to use the dominant colour in the painting but dial down the saturation so the signature doesn't distract from the painting.
If you have a common name you may want to consider how to make yours look unique. Simply adding an initial could work or, if you have a long name, perhaps just initials. I spent a lot of time deciding on my personal form.
I also sign in the same place (bottom left) but famous artists like Vincent van Gogh signed in unusual places depending on the image. Sometimes, especially with my abstract art, I won't sign on the front at all and some commissions the clients have asked for the signature to be on the back, known as en verso.
For completeness, I also print my name and sign again on the back of the painting and also include the title of the work and the date it was finished.
4. Give it a title
I don't know if one needs to name every painting but I find it invaluable in helping me keep track of what I've produced. Sometimes the title can be obvious like “woodland stream” but with abstract art you can have some fun with naming and get quite imaginative. In fact, I often ask my followers and subscribers to suggest names which also helps build engagement.
Trust me, you really do want to name your paintings. After my first year of being highly prolific in creating artwork I found it very difficult to keep track of which paintings I had in stock or sold!
5. Photograph your painting
This task goes hand in hand with naming. You will need good quality photos of your paintings for a variety of reasons: updating your website, advertising your work to keeping track of what you've created. You'll also want an image for your Certificate of Authenticity.
Photographing paintings is an entire post of its own so, for now, I'll just say that your images need to be well focussed and framed, of high enough quality to be enlarged but not so large that your website grinds to a halt.
6. Create your Certificate of Authenticity
If you're going to sell your artwork you need a CoA. Why? Because it looks professional and enables the buyer to have a record that shows that it was you as the artist that produced the artwork and can help with maintaing its value in the future. I've posted before on this and you just need the basic details of what it is, dimensions, genre, media, a picture and any other details you think useful, such as how to care for the piece. Having spent hours producing these when orders came in I'm now glad that I create them as part of my finishing up process.
7. Apply varnish
Acrylic paint will, in all probability, last for years but if you're selling your paintings you'll want to be sure that they can stand the test of time. Varnishing will protect the paint from fading caused by UV damage from sunlight and prevent dust penetrating into the paint resulting in a dulling of the colours. Varnish can be applied as permanent or non-permanent. With the latter, a specialist could remove the varnish and bring the painting back to its former glory. With the former, once the varnish is applied, that's it!
Personally, I varnish with a non-permanent matt varnish because I like the finish. It goes on milky white and drys clear but without the glare you get from gloss finishes. It is, though, a matter of personal choice.
Just a word of warning: be sure your painting is totally dry before varnishing. Acrylic paintings can take up to two weeks to dry whilst oils can take anything up to a year. Varnish too soon and you risk smearing your painting.
8. Frame it
Not all of your paintings will need to be framed. Box canvases for example can be painted on the edges and hung as they are. Paintings on paper will need mounting between card, at the very least.
In some cases, particularly if the edge finish isn't great I will frame the painting myself. However, there is a risk that a potential customer could be put off if the frame isn't to their taste. Most of the time I leave framing until a customer requests it.
9. Update website
If you have your own art website now is the time to add your painting. Include at least one good quality photo but, if you can, I'd also suggest an image showing the painting hung in a room so that a customer can imagine what it would look like in their home.
Be sure to include as much detail about your painting as possible including your inspiration or reason for creating the piece.
10. Advertise and promote
Finally, all you have to do is let the world know you've created something. It's all very well getting it onto your website but, unless you have a huge following, very few will know your painting exists unless you tell them.
Update your blog to announce the new piece, post on Twitter, Instagram and Facebook. I'd also recommend posting to Facebook and eBay market groups and also to at least one on-line shopping platform. I use Etsy (this is not sponsored!) but I'm sure there are many others you could use. The beauty of these is that they do a lot of the hard work for you.
One final bit of advice: make sure your website prices match prices anywhere else you sell or advertise. Customers don't like to find out that they could have paid less somewhere else for the same thing!
Ten steps to complete so you can truly say your painting is finished! Good luck!

Inside my art studio
Ever wondered where my paintings get created? Did you think I had some swanky huge and spacious art studio or that I worked in a cosy loft space? Not quite! Today, I thought I'd show you where I work which, with lockdown restrictions and working from home, is now also my office. My point? One doesn't need a huge dedicated space to create art that sells. And tidiness is not essential either!
Ever wondered where my paintings get created? Did you think I had some swanky huge and spacious art studio or that I worked in a cosy loft space? Not quite! Today, I thought I'd show you where I work which, with lockdown restrictions and working from home, is now also my office. My point? One doesn't need a huge dedicated space to create art that sells. And tidiness is not essential either!

Painting station 1: where I paint smaller works
Work stations
My art studio is really not very large and now doubles as my home office. In terms of size, my space is a bit larger than the average garage. So, although quite spacious when it's empty actually doesn't leave a lot of room once it starts to get used. My solution was to set up work stations so everything is where it needs to be.
The image above is my desk and A2 sized easel. Here I work on my smaller paintings and also my water colour stufues. I also do my sketching and prototype paintings in this space.
Behind this area is my workspace for my large easel. This can take a painting of up to 6ft wide and 4ft high. I have my larger brushes and big pots of primer and under coats around here for ease of access. You can't see it but I also have the floor covered when working on larger canvasses so that I don't end up with a technicoloured floor!

My large canvas work space.
Finally, because I also have to work in this space I've also set up my office area which is another completely different space. The aim being that I don't need to move things around or adjust my room to meet the task in hand. For me this works well but it has taken a few iterations to get right. You soon find out when it's not working when you trip over cables or splash paint where you really don't want it! Anyway, until my art sales get to the volume where I need a dedicated external studio this will do nicely, although I am getting very close to that point. Of course, when that time comes then I'll be able to let people visit my studio which is not quite so simple in a condensed space! There is one final issue and that's where you store your completed works but that's a blog for another time.

My office space in the art studio.

Keeping up with the Kardashians!
It wouldn't be the weekend without another blog or without me trying to learn yet another new trick. Today I've taken my Instagram account to a whole other level by getting into Instagram TV. Brace yourself, I fear this could be a bumpy ride!
It wouldn't be the weekend without another blog or without me trying to learn yet another new trick. Today I've taken my Instagram account to a whole other level by getting into Instagram TV. Brace yourself, I fear this could be a bumpy ride!
Apparently, IGTV is a way of showing longer videos and in a pretty unvarnished state. It's also intended to be a way of showing more of one’s personality rather than polished products. So, never one to shy away from trying something new, I've already posted a video of me narrating a bedtime story. It's not quite Tom Hardy but it's close (😉).
Is this really the way forward? Well, it seems the top so-called influencers have all jumped on this and if it's good enough for the Kardashians then it's good enough for me. Okay, I don't really know who they are but with several million followers they must be quite popular!
I've already started to build a series for my art demos. Going forward I plan to show some of my works in progress which could be interesting because when things go wrong I tend to be quite vocal! I'm not sure how successful this will be but as Instagram is definitely the place to promote artwork I'm going to give it a go.

Virtual Art Gallery - Commissions
Welcome to Roy P Awbery’s virtual exhibition of commissioned artworks in acrylic and water colour. Take a look around and see if there’s something you like. I’m always open to commissions and love to receive a challenge.
Well, here it is! No music. No short piece to video by yours truly. And no linear, slide show experience. Instead, I bring you my first virtual gallery experience without ever having to leave your home.
The concept is simple, enter the gallery and just move your mouse (or finger) over a painting to see a full image and details and then return to the room from which you came. You can also move into adjacent rooms.
I plan to create more virtual exhibitions to show off particular genres of artwork, highlight my free paintings that I give away when I travel (if those days ever come back!) and so on. If you want to see a particular exhibition just let me know. Let me know what you think by leaving a comment below.
NOTE: You will need to open the file in full PowerPoint Slide Show mode to get the full effect. The mouse-over effects and navigation will not work on mobile devices.

Virtually an art gallery
Coronavirus may have stopped us going out and visiting art galleries and the like, but it doesn't mean I can't bring my gallery to you. I've made my first vudeo-based art gallery.
Coronavirus may have stopped us going out and visiting art galleries and the like, but it doesn't mean I can't bring my gallery to you. I've made my first video-based art gallery. See what you think. If you like it, click like and SUBSCRIBE if you'd like to see more.

Understanding Abstract Art - Why you should buy abstract paintings (Copy)
Don't get abstract art? Think it's just chaotic mess? Me too! Well, I did, but not now. There's far more too abstract than you might think and it's great for decorating your home.
It's just a mess! Anyone could do that! They've just thrown paint around! What's it supposed to be anyway? Sound familiar? For years I didn't like or understand abstract art. Then I became an artist and now I think I get it. There's more to it than you might think.

Understanding abstract art just requires an open mind
If I'm brutally honest, I really didn't like abstract art. Many of those comments were probably things I'd said in the past. But then, I didn't always like classical music either. It may seem odd but the two are related. It's all about having an open mind and opening oneself up to something new.
My first experience of abstract art was an exhibition at the Tate Modern in London. My wife dragged me there, almost kicking and screaming! To me it seemed to just be pretentious nonsense. Random splodges of paint; chaotic; structureless (I like structure!) and seemingly pointless. Of course now I would argue that I was completely wrong and was simply approaching it with a closed mind and no wider thought or imagination. Put another way, I was trying to understand something in a very binary way when it wasn't possible. The abstract artist isn't trying to paint a single image or meaning. Abstract art requires a little effort from the viewer.
Feeling it
Take classical music. I spend more time listening to Classic FM than I do watching TV. I don't know the notes or understand how the composition was put together. I don't even hear all of the different instruments in a symphony. And I don't need to. I simply listen and allow the music to transport me. Each piece may invoke a different feeling or mood but this isn't something that was intended by the composer, it comes from within and is deeply personal.
Filling in the blanks
The same is true of abstract art. An artist isn't necessarily trying to show you a specific image. You, as the viewer, have the job of providing that meaning and deciding what feelings a piece invokes. It just requires an open mind and a little imagination. Do this and suddenly a whole new world opens up in front of you. Yes, I know, it all sounds very poetic and ideal. But, from someone who really didn't get abstract art I can safely say it's true. I don't just paint abstract art, I also enjoy it and spend a lot of time looking at, and enjoying, other artists’ work. I enjoy the process of trying to work out what I can see and looking for patterns and meaning that are personal to me. Quite literally, my job as the viewer is to fill in the blanks. The artist's job is to provide something for me to ponder on.
But is it art?
Okay, maybe you don't quite buy the poetry of it all and are not so convinced about moods or feeling. So why would you hang abstract art in your home? A recent client of mine explained this simply: abstract art can be used to decorate a room easily. Seriously?
If you think about it this makes perfect sense. If you're looking for something to decorate a wall in your living room and your decor calls for something red, blue or whatever colour you have in mind, abstract art can provide it. Moreover, abstract art tends to be more thought out than you might think. Often, complimentary colours are used to create a balanced image and these can be used to blend in with the decor in a room. A very plain wall in a minimalistic room could be transformed with a single, large and vibrant abstract painting. Equally, a busy room can be toned down with a simpler abstract painting.
Food for thought
Finally, abstract art can, and often does, provide a talking point. Not everyone will like it. Not everyone will get it. Not everyone will see what you see. And that's absolutely fine! So talk about it. Discuss and debate about it. Hang an abstract painting in your dining room and you can be certain that someone will want to talk about it. If nothing else, you'll have something to talk about if the conversation at your next dinner party ever runs dry!

Why gallery representation isn't for me - yet.
Many up and coming artists seem to think a key goal is to get their artwork into a gallery. I don't! There are good reasons for wanting to get into a gallery but there are also good reasons not to. Here I explain why it's not for me, despite being offered the opportunity and why it's good for you that I don't.
Many up and coming artists seem to think a key goal is to get their artwork into a gallery. I don't! There are good reasons for wanting to get into a gallery but there are also good reasons not to. Here I explain why it's not for me, despite being offered the opportunity and why it's good for you that I don't.

Gallery exhibition? Maybe one day.
Having made a success of advertising and promoting my artwork over the last year you'd think it would be a good time to get into a gallery. Surely it's time to get my paintings sold from a smart and sophisticated gallery setting. And what about all those potential new customers? Well, not so fast!
I was recently approached by a gallery to ask if I'd be interested in them representing my work. This sounded both exciting and flattering. I'd finally become a real grown up artist! But then I did some research…
First of all galleries, at least good ones, don't typically approach artists. It is more usual for an artist to approach a gallery and have to sell themselves. So that was the first red flag.
High sales commissions equals higher prices
Then I discover that they take 51% of the sales! This would have the knock on effect of pushing my prices up by at least double just so I could make the same money. This would also increase all of my prices thus making a lot of my paintings unaffordable to those who have previously bought from me.
Restrictions imposed - no personal sales
Another issue I had was that the gallery insisted that only they could sell my works. I wouldn't be permitted to sell from my own website or other outlets. I would be allowed to show and advertise my work though.
Free giveaways banned
Another restriction was that I wouldn't be allowed to give any paintings away for free or leave any in cities to be found by lucky recipients. I get a great deal of enjoyment out of doing this and found this restriction a step too far.
But there are positives to galleries
Okay, galleries can't be all bad, and they're not. My experience is based on one instance and probably not very representative of the wider industry. Galleries can put your work in front of a wider, interested audience. The presentation and setting for your work is more professional. A gallery may be able to advise on trends and help you develop your works to march potential customer needs.
But getting into a gallery doesn't mean relaxing
Of course, it might seem simple. Put your work into a gallery and let them do all the hard work for you. After all, you're paying half of your sales to them do you don't need to do anything, right? Wrong! You still have to self-promote and still have to engage with potential customers whilst still doing what you should be doing - painting. I'm only touching on this subject very lightly but gallery representation doesn't mean zero effort on your part.
So would I ever use a gallery?
I wouldn't be so quick to dismiss galleries. At the current time they're not for me. Equally, I may not be for them right now. They do have their place though and reputable galleries may well be able to open up opportunities that I couldn't reach without help. However, for now, I'll keep to personally advertising and promoting my work. It's working.

Why I don't mix my paints
Can you mix student and professional grade acrylic paints? Many websites and indeed artists will say yes. I would argue that you shouldn’t if you want high qualityand consistent results. Here I explain why I don’t mix my paints.
Acrylic paints come in a variety of grades and can be summarised as student grade and professional. Can you mix the two? Why would you want to? When should you use one over the other? What happens if you do mix the different grades? Will the world explode? Will the artworld disown you? So many questions! I’ve used acrylic paints every single day for over a year now and here’s what I’ve learned.

Paint Quality
Acrylic paints generally come in two grades: student grade and professional (also known as artist grade). Professional paints tend to come in a wider range of colours than student grade and have deeper colours due to the increased amount of pigment compared to binder. Students' colors are cheaper but you will find there tends to be a smaller selection of colours and specialist colours may not be available at all. I’ve also found that, due to the increased amount of filler, the colours tend to be weaker. I have found that professional grade paints are more vibrant and lively and are often more consistent in their viscosity (how thick or thin they are) and this makes them easier to blend.
The ability to blend paints is key for me. I paint a large amount of abstract and landscape paintings where fine blending is required. I have found from experience that mixing the two grades of paint and cause the paint to suddently stick or drag which makes blending extremely difficult. Of course, you can blend in both grades but I find it harder if the two grades are mixed so I don’t do it.
There is of course a place for student grade paints. I use them for prototyping my larger paintings and commissions rather than using expensive paints. They are also perfect if you are just starting out but if you are intending to sell your work then I would recommend moving on to professional grade paint, particularly because you will want your colours to have longevity.
Colour Longevity
If you intending to sell your artwork then you will undoubtedly want your work to last a long time. Paints, like anything that is coloured, will be affected over time from exposure to variations in temperature, humidity and light. Fairly obviously you should recommend that your paintings are not kept in direct sunlight - UV radiation will very quickly dull your colours and lead to fading. But there is something you can do to help - use paints with high pigment to binder ratios, which means using professional grade paints.
A subtle point I learned was what is meant by the word “hue”. Without getting into the detail, hue simply means that a colour is intended to closely mimic a natural pigment of that colour but it isn’t actually the genuine pure pigment. This too can have an effect on how long your colours remain as you painted them. So put simply, use the best quality paints you can if you want your work to last.
So, if you ever wondered why many paintings are quite expensive it is likely to be partly due to the cost of the materials used as well as the skill of the artist. The benefit to you of course is that you can be sure that your painting will last a very long time and maybe even increase in value over time.

Primed and Ready. Why prime a Pre-primed Canvas?
Jackson Pollock didn't always prime his canvasses and sometimes even used household emulsion when he did. So why prime canvasses before painting? Like anything in life, quality is built on good foundations.
Jackson Pollock didn't always prime his canvasses and sometimes even used household emulsion when he did. So why do I prime my canvasses at least three times before painting? Simple, because I want a good surface to work on and I want my paintings to last. Like anything in life, quality is built on good foundations.
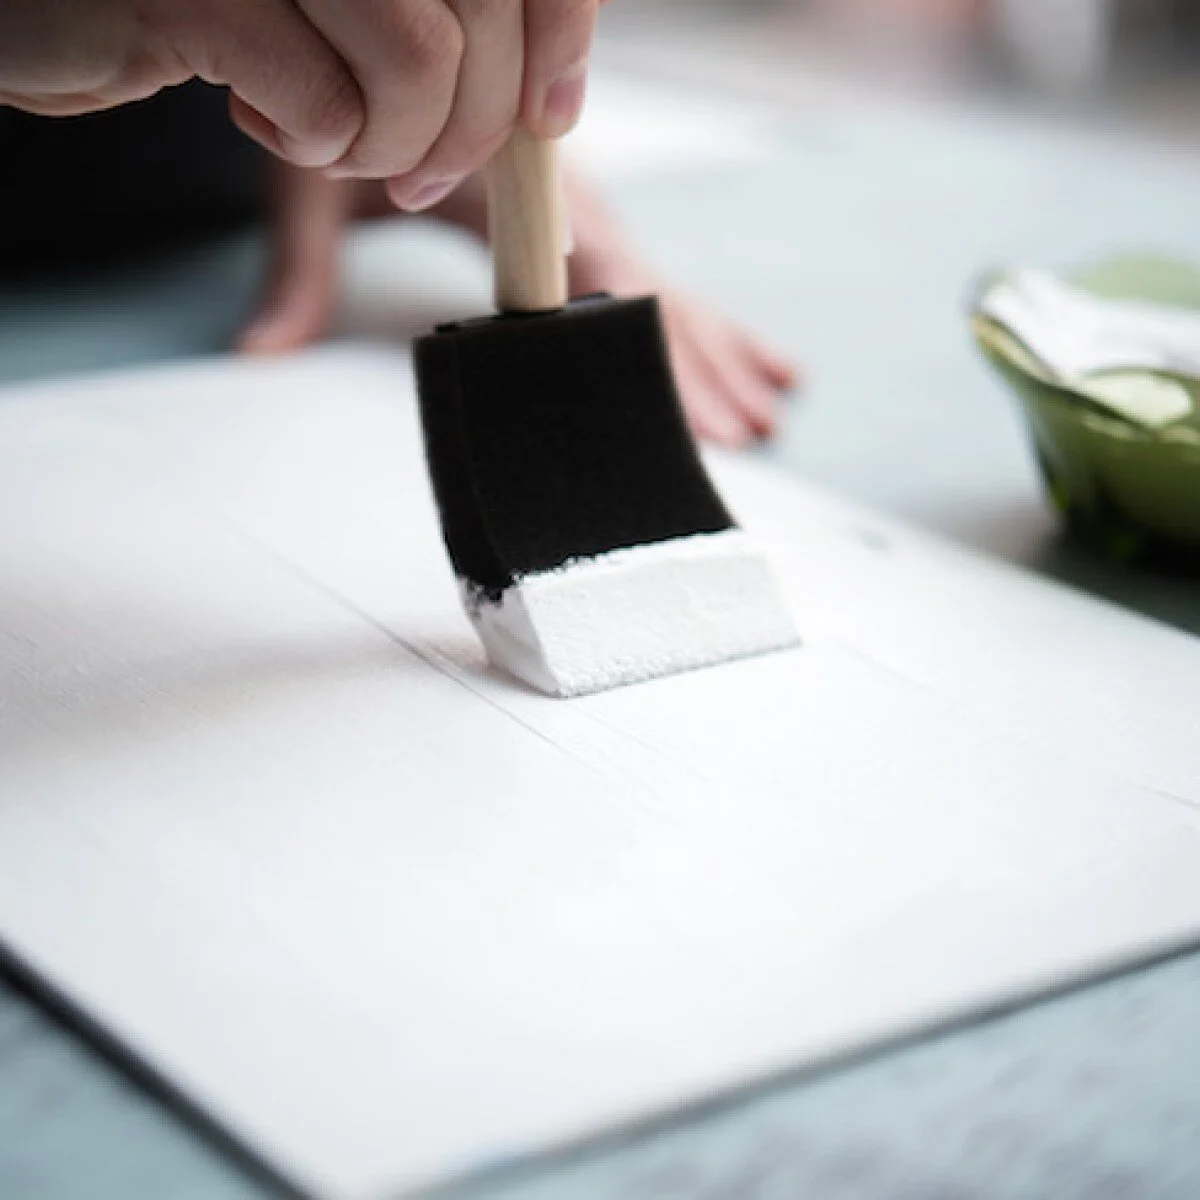
A well primed canvas is the foundation to any good painting
Almost all commercial canvasses arrive pre-primed and some even claim to be triple-primed and ready for use. However, I've found that all need some preparation before use. Priming the surface means making it ready to take on the acrylic or oil-based paints one intends to use and to also improve the painting's life span. Apparently, some Jackson Pollock paintings were not primed, or were even primed using household emulsion (yes, really!) and are already showing premature ageing.
Why can't I use pre-primed canvas?
So what's wrong with pre-primed canvas, I hear you ask? Put simply, it is not in the economic interests of commercial suppliers to prime canvasses with thick layers of high quality gesso (the primer). They are more likely to apply thin coats of weak primer simply to provide a modest layer over the canvas. This results in a surface, fresh out of the box, that can be inconsistent (rough and smooth in different places) and a lot more porous do you will use more paint. The surface may also be relatively rough (toothy) which may be fine if that's what you want (some artists like and use this effect) but I find a smoother surface much easier to work on and I use less paint.
How I prime my canvasses
I'm sure every artist has their own ways of preparing their canvasses and this is mine. It takes some effort but it is worth it, in my opinion. In summary, here's what I do:
Dust off the unpacked canvas with a lint free cloth.
Lightly sand the surface with a very fine grade dry sand paper.
Dust off the surface again with a lint free cloth.
Apply a generous layer of good quality primer with a wide flat brush, brushing in both horizontal and vertical directions.
Allow to dry completely.
Sand the surface again with very fine grade dry paper and dust off.
Repeat the application of gesso primer followed by sanding and dusting.
For the final coat, apply the gesso primer with the flat brush but the smooth the surface, before it drys, as follows.
Using a wetted mop-head brush with very fine hairs brush straight across the canvass in horizontal strokes in a single movement from left to right. Work down to the bottom of the canvas. This smooths out any lines caused by the flat brush.
Allow to dry completely.
The canvas should now be ready for use.
This method works for me and I have found that my paints are much easier to apply and work on the canvas. I prefer not too have too much tooth showing in my paintings so this method also serves to reduce this effect. Beyond this, a solid foundation should ensure that my paintings last for as long as possible.
But if it was good enough for Jackson Pollock….
Now, you may wonder why it's not advisable to use household emulsion. After all, it's cheap, has a consistency similar to gesso primer and it was good enough for Jackson Pollock. Well, quite simply, it isn't good enough. Some of Jackson Pollock's works have already started to suffer from premature ageing. Most notably, cracking. One only has to consider how emulsion behaves in the home. Over time, and with exposure to varying temperatures and humidity, it will crack. It's just not designed to cope with movement and one can imagine how much movement a cotton or linen canvas would experience. So, don't skimp on primer. Use high quality gesso and leave the emulsion for your house!

Getting engaged! How to master Instagram
Positive engagement is key to success with Instagram and I’ve now learned that it’s good to talk. Good engagement can increase followers and your overall engagement rate leading to more sales.
Instagram is clearly the most influential social media platform for promoting one’s artwork and I can honestly say that I get more engagement, which turn into sales, from Instagram than any other platform. But my following and level of engagement has plateaued in recent months so it was time to come up with a strategy. My previous post discussed the importance of imagery and this one will explore positive engagement. It turns out that it’s good to talk!
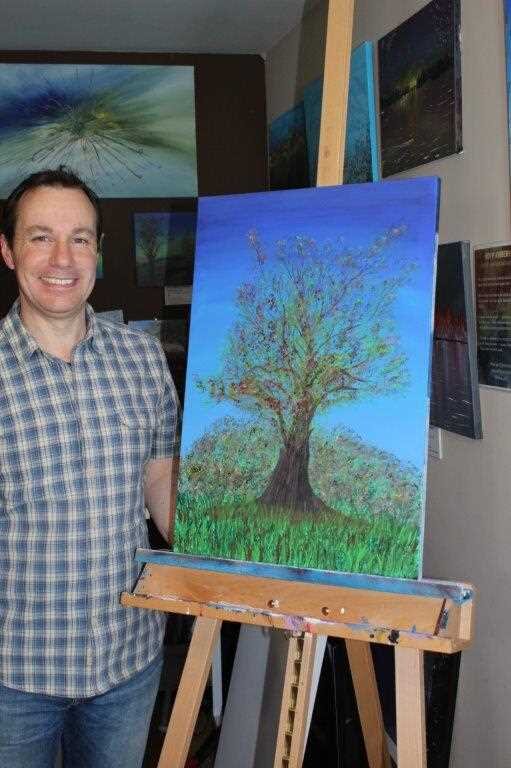
It really is all about engagement. There are many accounts out there with apparently thousands (even hundreds of thousands) of followers but all may not be as it seems. It turns out that you can buy followers or even pay to get an inflated number! Of course, this means they are not real followers and therefore not real potential customers. One way to spot this is to look at the level of engagement in someone's post. Someone with over 10k followers but only getting around 100 likes and a couple of comments is clearly not looking too genuine or has a very large but disengaged (disinterested?) audience.
I have therefore learned that success on Instagram is not measured by the number of followers but more by the level of engagement. I now make a point of not only liking an image I genuinely like but also commenting back and sometimes starting a dialogue with someone. It could be about their current work, their inspiration and motivation. Anything, as long as it's meaningful. And it's working. I may only have just under 700 followers but all were organically grown and I get around 15-20% engagement if I count direct messaging. Some of my sales have come directly from Instagram too!
So, put simply, it’s good to talk! I’ve been using this strategy for about a week now and, combined with the photos of me smiling a lot, my engagement rate and number of followers has significantly increased. I’m less concerned with the number of followers as that doesn’t necessarily mean more sales. I think the number of followers is mostly a vanity measure. The engagement level, however, does tend to give an indication of success. If people are contacting me and discussing my paintings it is far more likely that they may want to buy something or, if they are an artist themselves, they may wish to collaborate on a joint article, for example.
It really is good to talk!
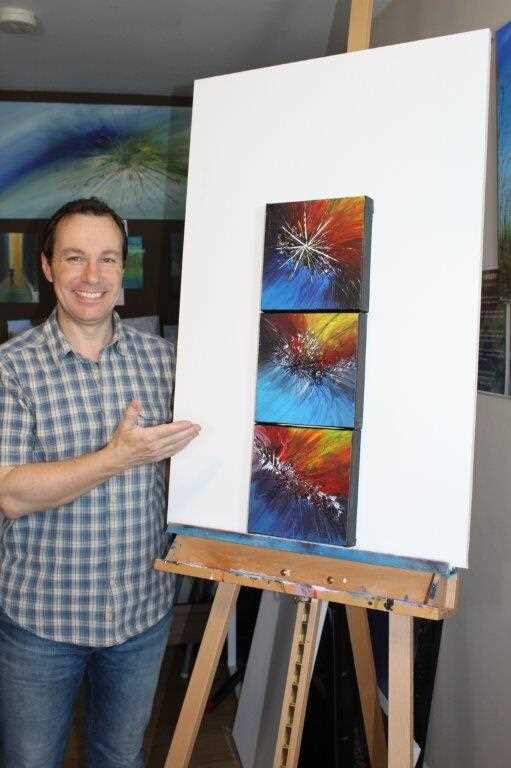
Say Cheese! Why I'm appearing with my paintings
Why posting pictures with my artwork is necessary and paying dividends. More cheesy smiles to come!
When I started painting I thought I could get away with just posting the odd picture on Facebook to show my friends what I'd done. As things have developed and I now sell regularly there is a need to publish images across several platforms. What I didn't realise is that cheesy smiles sell. I'm so glad I look after my teeth!

Say Cheese! Showing one of my pieces in The Elements series
Since my art sales picked up I realised I would need to promote my works to a wider audience and thereby increase my chances of sustaining this success. The most obvious way was to engage with social media. So, with some expert help from my kids I set up an Instagram business account amongst others. Until now, I had no idea what I was doing and assumed if I followed a few people they would do the same and in no time I would have tens of thousands of followers and potential customers. I was wrong! It seems there is a bit more to it than that.
I was already ticking one box and that was to ensure that I posted images regularly and at the right times of the day when people are more likely to see my posts in their feeds. Instagram exposure is transient and you don’t get to stay on peoples phone screens for very long. The other thing was to ensure that the images I posted were good quality and represented what I did. Not just painting though, apparently it is a good idea to show that you’re a human being so posting photos of my other activities was also another tick in the box. But, all this was fine but my level of engagement and followers had flatlined, neither going up or down. Something had to change. Well, as it turns out several things but I’ll address just one in this blog.
I discovered, by looking at other artist's profiles, that one needs to show some personality and pictures of oneself with the artwork. I needed to clean my teeth and say cheese - a lot! When I looked at some of the most prominent and successful artists promoting their work on Instagram the same thing showed up - they were all showing themselves with their artwork or in their studio or in the midst of working on their latest project. If you don’t believe me take a look at Swarez, Sophie Tea and Lina Vonti, as good examples. These three combine high quality imagery, engaging and interesting photos and include something of themselves that provide an insight into their personalities. I’ve only been an artist for a year and a selling artist for much less, and although I’m enjoying regular sales I’m still almost unknown. So, following good practice can only help, which is why I follow these amongst others.
I've only just begun to do this in the last few days and it has already had a marked effect. In just 7 days my following has increased by another 15%. Not too bad at all!
Of course, this all means you will now be seeing a lot more of me and my cheesy smiles! I guess eating spinach is off for a while!